
Enter the FASTMAP/Maintenance menu, which looks like this:
and click on Adj. button to adjust tpwr. The system responds with a request for parameter, enter tpwr, as shown below:

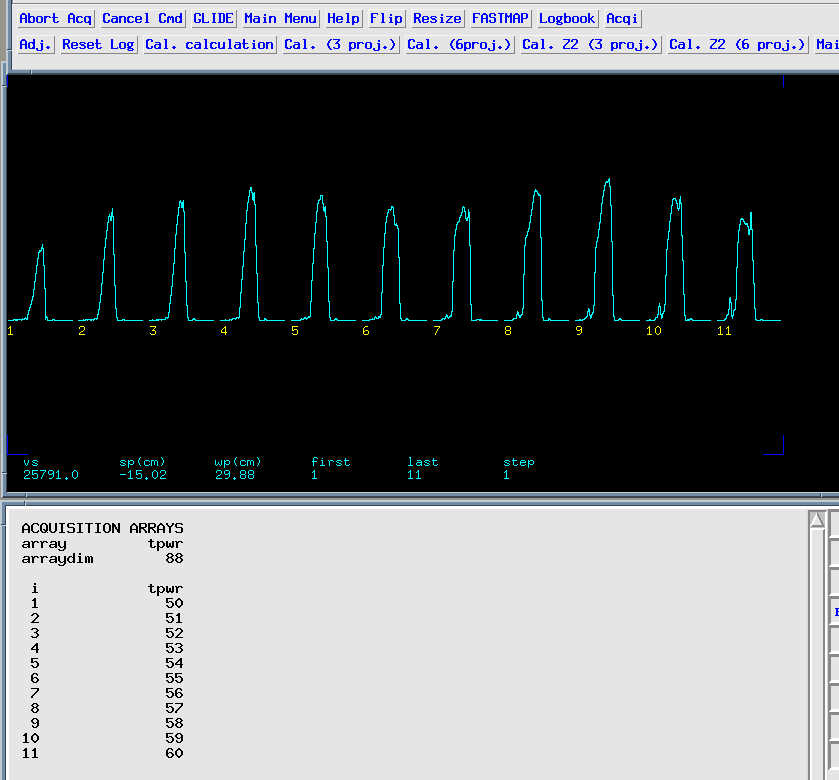
and a reasonable range of values to include B1 on the order of 0.5-1 kHz. Then start acquisition using, e.g., ga and watch for a reasonable maximum at the center of the projection and set tpwr to that value. The overall projection could look like this:
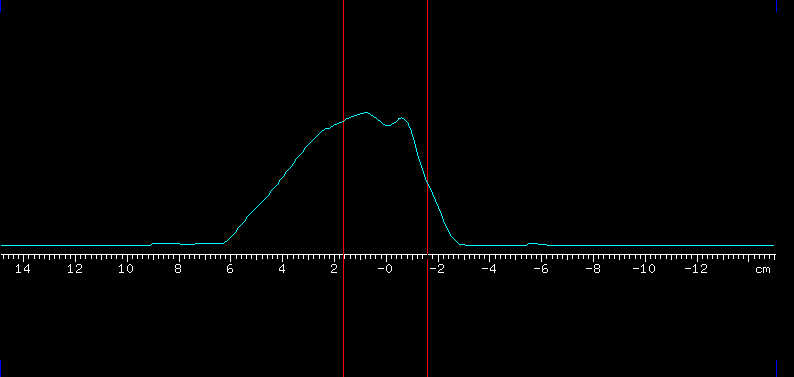
but be sure to watch for the adjustment at the projection center, e.g., in the region between the red cursors below:
and when expanding this region the arrayed projections could look like this:
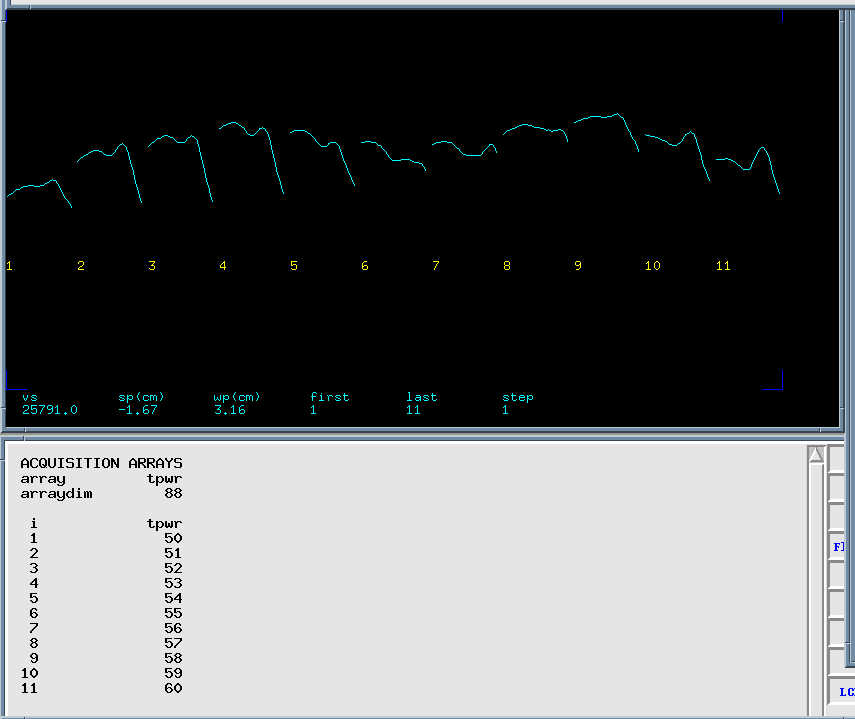
and probably the ninth projection would be selected. (The projection is along the y axis, assuming that this is vertical, in most cases coincides with the axis of the surface coil. This is controlled by the parameter off, with off=0 along x, off=1 along y and off=2 along z.).
NOTE: If you do not hear or see evidence that the acqusition starts check the parameter ticks - This is set to one initially. In that case set ticks=0, and the sequence will not wait for an external trigger and should now pulse.
gain - set the gain such that you get a reasonably digitized echo, but not to close to the ADC range in order to avoid ADC overflow in future experiments.
Now you are ready to test the basic performance of the sequence: in FASTMAP/Setup first click on "Coil Pos.", which will start an acquisition along x, y and z and at the end display the x y and z projection (dss), as shown below:
To check that gain and signal are ok, use dfsh with vf=100 on the above three projections and you should see reasonably well described echoes in the order x, y and z.
To verify performance of FASTMAP click on "Setup/6 proj." (set default # of echoes to zero) then "Setup/nf_def=0" and enter 0 which will set epi='n'. Now set tau to e.g. 0.005 or 0.01 in "Setup/tau" depending on quality of the shimset. Set tr to 2 or better 3 s. Now you are ready to run a test run by clicking "Return/Manual adjust/go". After the acquisition completes, click on "FASTMAP/Maintenance/Test calculation" and enter a shim coil name (x1, it is really irrelevant which one you use) and watch the output in the shelltool or terminal window from which you started vnmr. The output should show some reasonable numbers for kx, ky, kz, kzx, etc. (Unreasonable #'s are NaN, caused e.g. by using tau=0). Especially the RMSD (#'s provided in parentheses for each of the six projections measured) should be very small, should be less than 0.1, but typically the numbers are on the order of 0.02-0.07 (Hz).